Google Web Designer: Design Tool to Create Interactive HTML5 Ads

If you follow Google’s development close enough, you probably know about this but if you don’t, the giant search engine company has recently launched a new tool call the Google Web Designer. In short – this is Google’s version of Adobe Flash. Only that the output is in HTML5 and CSS3, and it’s currently limited to creating ad banners.
As stated by Sean Kranzberg, Google Engineering Manager, in the announcement for the tool:
"We think that Google Web Designer will be the key to making HTML5 accessible to people throughout the industry, getting us closer to the goal of “build once, run anywhere".
Hacking Is Magic, Google Web Designer, HTML5 Ads
Google Web Designer is available for Mac and Windows. Let’s see what this beta version of Google’s latest product has to offer.

Getting Started

We can create a new blank file for HTML, CSS, JavaScript, XML, and Google Ads, which provide a set of pre-defined ad size that is also the standard of the Google AdSense ad format. New file creation requires us to specify the document title, the name, saved location.
Hacking Is Magic, Google Web Designer, HTML5 Ads

Animation Mode

This is something that we might not find in other web page creator applications – the Animation Mode.
There are two options in Animation Mode: Quick, which gives us simplified toolbar for creating basic animation, and Advanced, which will give us the advanced toolbar for arranging more complex animation. We can also opt between these modes when the file has been created.

Adding New Element

Google Web Designer provides a set of standard User Interface, which is easy to get accustomed to. The left toolbar lets you select tool sto add new element.s The default element generated would be the div element. But, you can have it changed.
  1. Select the Tag Tool.
  2. Go to the top toolbar, and select the Custom Element.
  3. Specify the element you want to add.
Hacking Is Magic, Google Web Designer, HTML5 Ads
On the toolbar to the right, you can modify the element’s property such as the padding, margin, dimension, border, as well as see all the CSS rules that are applied on the element.
Hacking Is Magic, Google Web Designer, HTML5 Ads
Furthermore, Google has created an overview of the UI in the following video. Watch it to get further insight.

Animation

This is where we build animation with HTML5 and CSS3. This feature is better explained with a live demo, and Google has one for that, which so much easier to digest than. Enjoy:

Conclusion

In spite of its name, Google Web Designer is aimed at advertisers rather than web designers in general.
In fact, the official announcement is posted on the Adwords Agency blog. But, despite of the name and Beta status, Google Web Designer is quite functional for creating web animation
I’m definitely looking forward to the improvements in the next version.
Read More...

Spice Up Your Google Search Background [On Chrome] | Hacking Is Magic

The trend these days is that if you want the answer to something, you don’t ask a grown up, you ask Google. I’m sure for most of you the Google search page is your start page, especially if your favorite browser is Chrome. Notice that the background of the Google search page is a blank sheet of nothingness, well, apart from the search bar of course.
customize google page
How about we spice things up a little by adding a background or your own picture? With this Custom Google Background extension, you can customize the Google search page background to something of your liking (but only on the Chrome browser).

Getting Started

First, add Custom Google Background extension to browser. It will ask for permission to access your data and browsing activity.
add extension on chrome
Next, you will be forwarded to the Settings page. Choose the image you want to use for Google search background from your hardisk or from a URL.
You can upload more than one image and even leave it on random mode so your background will always change as you reload the page.
select images
Not only that, with this extension you can personalize the Google search page. Choose to hide certain elements from the search page such as the Google logo, the "Lucky" button, the footer and much more. You also can adjust the position of your image.
personalized google page
Bored with the current image? Just click on "change background image" at the bottom left side of the page, and it will redirect you to the Settings page and you can make your changes there.
how to go back to settings page
Read More...

How To Add New "Send To" Destination (Right Click) In Windows | Hacking Is Magic

When transferring files out of your computer in Windows 7 or 8, you will normally right click on the required file, then select the ‘Send to’ option. You can then send the file via Bluetooth, third-party services like Dropbox or Evernote among a few other destinations.
However, some of these destinations may not be what you need or even use at all. Wouldn’t it prefer to customize these destinations as you like?
intro image. send to with no new location
With a little tweak in Windows operating system you can add more locations to ‘Send to’ without the need of any external softwares.

Getting Started

To add more locations to the ‘Send to’ menu, search for ‘Run’ from the Windows Start Menu.
search and run run
In the box that pops up, type ‘shell:sendto’ and press Enter.
open send to folder
You will arrive at a folder where you can add in your choice of destinations. To add, just drag and drop the location icon or copy and paste the shortcut of the destination you want.
drag and drop new location in send to folder
Check to see if your destination as been added, just right-click on any file and hover over ‘Send to’.
new send to with charger card location in it
You can insert as many destinations as needed under the ‘Send to’ option.
Read More...

How To Change Adobe Dreamweaver Code View Theme | Hacking Is Magic

You have probably been told that staring at bright computer screens for a long period is bad for your eyes. You might reply that we have dark themed websites and the dark backgrounds are cutting down on the damage caused. Plus, dark themes can make anything look a whole lot cooler.
If you work on Dreamweaver a lot, you might like this particular tip we have for you. We found a way to change the HTML view on Adobe’s Dreamweaver into ‘night mode’, thanks to CS6Shortcuts.com.
Dark Theme Dreamweaver
This is a really cool trick for coders, designers or developers working on Dreamweaver. It works on Adobe Dreamweaver CS6, CS5.5, CS4, CS3 and on both Windows and Mac platforms. And if you don’t like it, it’s easily reversible.
Here’s how you set it up.

Changing Dreamweaver Coding Theme

First, you will have to download this Colors.xml file, the file that will change the colors of the HTML tags and its elements.

Replace Colors.Xml File

With Dreamweaver closed, navigate to the folder where the Colors.xml file is.
For Windows XP:
For Windows Vista:
For Windows 7 & 8:
For Mac:
Upon entering the CodeColoring folder, you’ll see a single Colors.xml file.
Dreamweaver Colors
Rename the file to Colors_Original.xml. By doing this, you can keep the original file, for if you want to revert to default settings.
Dreamweaver Original Colors
Move or Copy and Paste the Colors.xml file into the same folder.
Edited Colors

Changing Background Color

With the light colored text settings inserted, you will have to change the default background color of the code window from white to black.
To do this, open Dreamweaver and press Ctrl + U to open the Preferences. Look for Code Coloring on the right panel and change the Default Background color setting to something dark.
Dreamweaver Background Color
A pure black background might not work so well because it will contrast with the white text too much, so a color like #2B2E46 works really well; you can experiment with other dark colors to find one that suits you best.
Dark Theme Dreamweaver

Revert To Default Settings

If you do not really like the change, the process is easily removed.
Remove the just inserted Colors.xml file. Then, rename the Colors_Original.xml file to just Colors.xml.
Dreamweaver Original Colors
Then in Dreamweaver, press Ctrl + U to open up the Preferences, click on Code Coloring on the right panel and change the Default Background from black to the color white.
Original Background
Read More...

5 Simple Steps To Keeping Your Smartphone (And Data) Safe | Hacking Is Magic

Smartphones have evolved from being able to just check email and has now allowed us to do somany other things when paired with other devices. Nowadays, we can pay with our smartphones with digital wallet apps are able to store multiple credit cards. Most of our private information(together with other contact information) can be found in the apps on our smartphone through chatlogs, pictures, calendars, and notes.
Mobile Security
This is why we rely so much on our smartphones and store so much sensitive data on it to make our lives easier. With all these sensitive data onboard a tiny device, we should pay more attention to keeping it safe and away from anyone unwanted. Here are some precautions to help you.

1. Set Lockscreen Security That Self-Destructs

Leaving your phone unattended on a desk for a few minutes could lead to someone accessing it to extract lots of vulnerable information. Which is why enabling lockscreen security is essential to keeping your smartphone away from unwanted users.
This is the easiet way to defend you and your data, and pretty much every smartphone has this feature. Manufacturers know privacy is important to users.
Some thieves would try breaking the lockscreen by trying out passwords but to really keep your data safe from brute force hacking, you could enable a feature that erases all data from your smartphone after a preset number of failed attempts.
On the iPhone, it can be enabled under Settings > General > Passcode Lock > Erase Data.
iPhone Lock
By default, this kind of feature is not available on the Android, but you can enable a similar effect with a free app like Autowipe .
Autowipe

2. Turn Off Settings When Not In Use

Hackers are able to do all sorts of things that will surprise you. Turning off phone settings likeBluetooth, Location Services, Near Field Communication (NFC), Wi-Fi and even Cellular Datawhen not in use not only conserves smartphone battery but also gives hackers less access to your device.
Location Services and Bluetooth should not be turned on when not in use as apps can use lots oflocation data without you knowing it. As Bluetooth is constantly transmitting your devices’ location and presence, it is possible for hackers to use it to gain access and extract any kind of information found on your device.

3. Don’t Download Shady Apps

Apps are probably the only thing that can harm you by stealing your personal data. When downloading an app, make sure that all the details of the app comes from the original ‘company’ or correct developer. Some sneaky apps might even trick people to download a "New and improved HD version" of a legitimate app, so make sure you check a few app details before downloading.
For instance a mobile banking app (or any app that handles financial accounts) should come from the bank itself as seen here on the iOS App Store, and not some other seller or developer.
Apps
App ratings and comments can also tell a story. If it’s a popular bank or financial service (PayPal) app that has no rating or comments, chances are it might be fake and you should be careful about downloading it and logging in. So be sure to download apps only if it has been rated many times and has multiple comments.
Rating

4. Be Wary Of Fishy Apps And Links

Viruses on mobile platforms can be present in many ways. It can be in the form of a ‘dirty’ app that runs in the background transmitting user data. As the Android system allows third-party apps or programs to be installed (very easily), Android users may open their mobile system up to attacks if they are not wary of the apps they download to their phone.
There are however anti-virus scanning apps and other tools on Android that can detect and remove anything that can harm your privacy.
Mobile Security
iOS users do not have anti-virus scanning apps, basically because there isn’t a pressing need for it.Apple is very strict with what gets on the App Store and will take down apps that harm its users in any way. Skip clicking on links in SMS, MMS, or even email attachments from unknown or unauthorised senders. Avoiding anything fishy altogether is very simple and should be practiced.

5. Do Not Lose Your Smartphone!

Not losing your smartphone is sometimes easier said than done. Of course no one wants to lose their smartphone, but unfortunate circustances might happen. You might have left it in a bar, in public transport, someone pickpocketed you during your vacation or you might have grabbed someone else’s phone by mistake. In all accounts, chances are your phone is good as gone.
Lost Smartphone
If these things have a tendency to plague your life (some of us are serial phone-losers), installing apps that can locate your smartphone on your iOS or Android device is essential. These apps can help you locate your phone and some have the option to wipeout the data on the phone so you don’t become a victim of identity theft.

Conclusion

To be fair, there is no one mobile platform that is safer than another. With so many devices but only a handful of platforms to choose from, attackers are able to target any platform they desire and the repercussions can be quite devastating to power users. We, as users have to be cautious with what we do to and with our smartphones.
If you work extensively on with your smartphone, you might want to look to BlackBerry phones as they have encryption features in their devices. Finally, because Android is an open source platform, it is more vulnerable to attacks as hackers can easily find vulnerabilities on each device; iOS or Windows Phone are less vulnerable because their system codes are not openly shared to  the public.
Read More...

Bypass Windows Login Password with Trinity Rescue Kit | Hacking Is Magic

Trinity Rescue Kit (Click Here to Download) is use for to bypass the Login of windows platform windows 7, XP 2, XP 3 and all. Most systems that use a password authentication mechanism need to store these passwords ( or their hashes ) locally on the machine. This is true for Operation system  (Windows ,Linux,Cisco IOS) Network hardware ( Router, Switches) etc. Windows Stores local usernames in the SAM database ( Security Accounts Manager ) , as well as in other places .   
     The SAM file can be found in %SYSTEMROOT%\system32\config and is inaccessible for reading,copying or writing while Windows is running .  A backup copy of the SAM can usually be found in %SYSTEMROOT%\repairs. This file is not locked by the OS and can be accessed given sufficient privileges.

Step 1 :- Check the Username of Target Machine

(Click on Image for Larger Preview)

Username is Testing

Step 2 :- Boot the Trinity Rescue Kit CD or Bootable Pen Drive

(Click on Image for Larger Preview)

Step 3 :- After Booting Press default option (Run Trinity Rescue Kit Default)

(Click on Image for Larger Preview)

Step 4 :- Wait for Shell

(Click on Image for Larger Preview)

Step 5 :- Use command : winpass -u Username then Enter

Here my Username is Testing

Command:  winpass -u Testing

(Click on Image for Larger Preview)

Step 6 :- After command it ask to make for Choice there are Two options [q] -quit and [1] -contin

(Click on Image for Larger Preview)

Step 7 :- Now after Press 1 it will show again 5 more Options 

1. Clear    2. Edit    3. Promote Use    4. Unlock    5. Quit

Press 1. for Clear the SAM File

(Click on Image for Larger Preview)

Step 8 :- SAM file is clear now, Reboot & it will Automatically Starts the Windows 

(Click on Image for Larger Preview)

Step 8 :- Finally you Bypass the Login Successfully

(Click on Image for Larger Preview)

This Post is Submitted by Rahul Singh ( www.rmar.in )  |  Join him on Facebook 
Read More...

How To Add Shortcuts To ‘My Computer’ On Windows 7 & 8 | Hacking Is Magic

The ‘My Computer’ icon gives us easy access to our hard drives (or SSD), removable flash drives and other network-related locations. But if you’re one who enjoys a clutter-free desktop, then maybe you can use this tweak to remove the many program and folder shortcuts on your desktop.

Here’s a way to get more usefulness out of ”My Computer” by adding the shortcuts that you need to it. This also gives you quick access to the program or folder and works very well with Windows Explorer tabs tweak like Clover. Here’s how you can add shortcuts to your ”My Computer” in a few easy clicks.


Adding Program Shortcut to 'My Computer'

First you’ll have to navigate to a special folder. Shortcuts placed in this folder will be displayed on ‘My Computer’.

Hit Windows Key + R  and type in %appdata% into the box and click on OK.


Then navigate to Microsoft > Windows > Network Shortcuts. Program shortcuts that you place here will be shown on ‘My Computer’, it’s that simple.


Once you have placed program shortcuts into that folder, you’ll be able to see the shortcut icons on ‘My Computer’.

Adding Folder Shortcuts to 'My Computer'

Because you can add any shortcut, you can also add folder shortcuts. To easily do that, just right click on your frequently used folder and click on Create Shortcut.


Now all you have to do is cut (Ctrl + X) the created shortcut and paste (Ctrl + V) into the Network Shortcuts folder, like how we transferred the program shortcuts earlier.

Adding Control Panel Shortcuts Shortcuts

You can also have quick access to frequently used Control Panel shortcuts on your ‘My Computer’. All you have to do is simply click and drag something from the Control Panel to the Network Shortcuts folder.


Here’s the final result of adding all these shortcuts.


Now your ‘My Computer’ will be well equipped with all your frequently used shortcuts and quick access links.
Read More...

6 Tips to Improve your Laptop's Battery Life | Hacking Is Magic

Working on the go and your laptop has run out of juice? This problem plagues most laptops as they tend to lose their battery capacity over time. But worry not, as there are several ways to improve laptops' battery life without too much trouble.

So, here are 6 ways to improve your laptop's battery life.

Laptop Display


Similar to phones, laptop screen is also a power guzzler. Keep the brightness as low as possible. Also, If you also have keyboard back lighting, turn it off.

External Devices


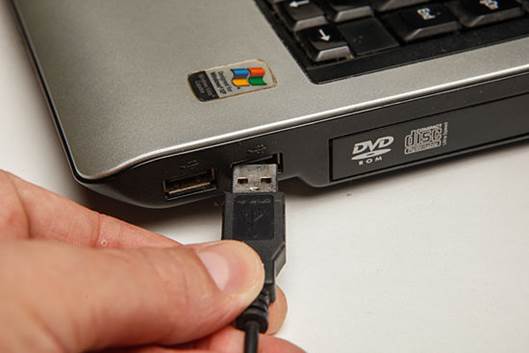
Any external device plugged in the USB port constantly draws power from your laptop. Removing them after use conserves battery.

Overheating


Overheating leads to the internal fans to run faster - which in turn consume more battery. Use a laptop cooler to keep the temperature at bay.

Hibernate


Instead of putting your computer on standby, choose to hibernate - it saves the state of your computer and shuts down the computer and saves battery.

Windows Power Plan


Laptops running windows have built-in power plan settings. You can choose various items such as display brightness, when to turn off the display/hard-drives and USB power. Use these to improve your laptop battery life.

Battery Care


This application records the battery discharge cycle and also shows a detailed battery status including consumption, manufacturer, wear level etc. It also shows CPU and hard drive temperature to indicate any overheating.
Read More...